“The success of a restoration is in the preparation”
-Henri Rotsaert, 1968, founder of Rotsaert Dental Laboratory
Why Tooth Preparation Design is Important
Uniform reduction results in optimum ceramic strength.
Adequate reduction leads to better aesthetics.
Smooth edges result in lower stress.
Lower stress decreases the potential for fracture.
Ceramic restorations require a passive fit.
Scanners read smooth preparations more accurately.
Basic Rules:
Circular shoulder preparation with rounded inner edges or chamfer with a width of approximately 1 mm.
No feather edges.
Avoid sharp edges and angles.
Make sure to observe minimum layer thicknesses (for the stability of the restoration).
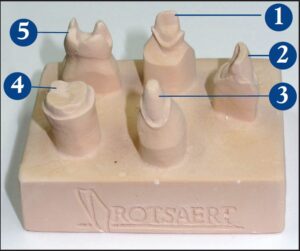
Preparation Guide for E.max and Feldspathic Restorations
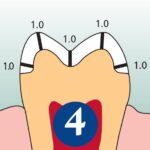
The first step of preparation is to reduce the anatomical shape and observe the stipulated minimum thickness. Prepare a shoulder with rounded inner edges or a deep chamfer. Width of the shoulder/chamfer at least 1 mm.
Reduce the incisal by approximately 1.5 mm.
Reduce the facial and/or lingual area by approximately 1.2 mm.
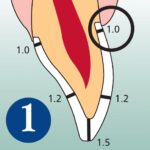
For conventional and/or self-adhesive cementation, the preparation must demonstrate retentive surfaces and sufficient preparation height.
If possible, the preparation should be located in the enamel.
The incisal preparation margins should not be located in the area of static or dynamic contacts.
Reduce the cervical and/or labial area by 0.6 mm and the incisal edge by 0.7 mm.
Reduce the anatomical shape and observe the stipulated minimum thickness. Prepare a shoulder with rounded inner edges or a deep chamfer. The width of the circular shoulder/chamfer should be at least 1.0 mm.
Reduce the occlusal by approximately 1.5 mm.
Reduce the buccal and/or lingual area by approximately1.5 mm.
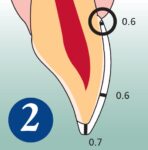
Reduce the anatomical shape and observe the stipulated minimum thickness.
Prepare a shoulder with rounded inner edges or a deep chamfer. Width of the shoulder/chamfer at least 1.0 mm.
Reduce the occlusion by approximately 1.0 mm.
Static and dynamic occlusal contacts must be taken into consideration.
The preparation margins must not be located on centric occlusal contacts.
A preparation depth of at least 1.0 mm and an isthmus width of at least 1.0 mm must be observed in the fissure area.
Prepare the proximal box with slightly diverging walls and observe an angle of 100 degrees to 120 degrees between the proximal cavity walls and the prospective proximal onlay surfaces. For onlays with pronounced convex cavity walls without adequate support by the proximal shoulder, marginal ridge contacts should be avoided.
Round out internal edges to prevent stress concentration within the ceramic material.
Do not prepare slice cuts/bevels or feather edges.
Provide at least 1.0 mm of occlusal clearance.
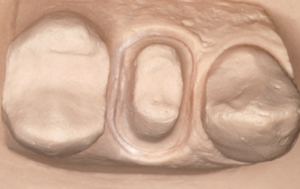
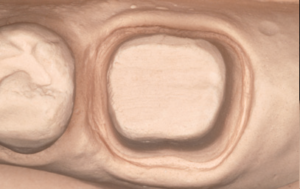
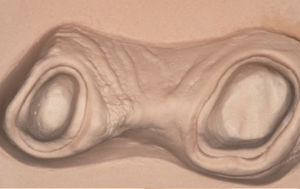
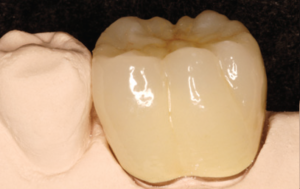
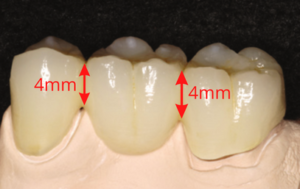
Preparation Guide for Zirconia Restorations
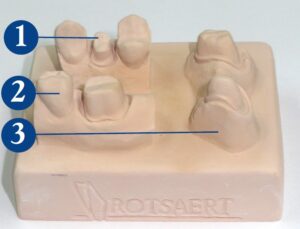
1. Pre-Molar
2. Molar
3. Bridge
Margins either a deep chamfer or a rounded shoulder may be placed 0.5mm supra gingival will enable a clear margin detail in the impression.
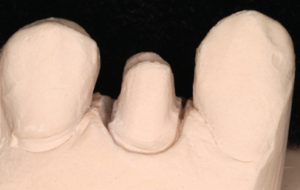
Preparation: • Rounded line angles • Definitive margins • No undercuts
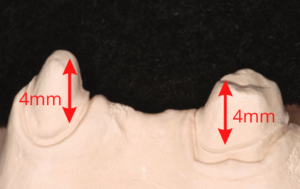
Ideal Preparation Reduction: • 1.5 – 2.0 mm Occlusal • 1.0 – 1.5 mm Lingual • 1.0 – 1.5 mm Buccal • Full Contour Zirconia 1.00 mm reduction
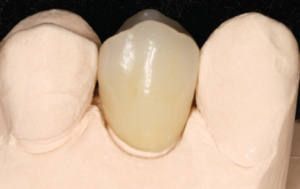
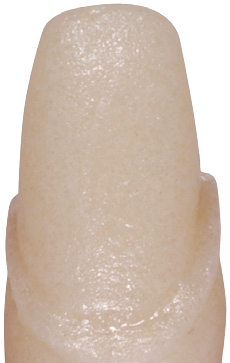
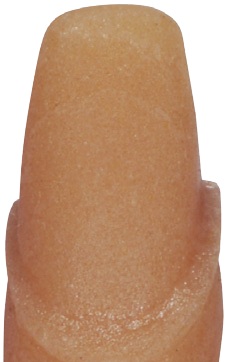
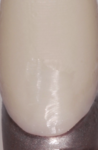
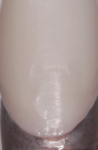
Preparation Shade
The effects of prepared tooth shade on Lava™ Zirconia 0.5mm copings using Translucent, A1 and A3 Try-In Paste
replicating RelyX™ Unicem Self-Adhesive Universal Resin Cement from 3MESPE
Preparation Shades
A1-A2
A3.5-A4
Metal
TRT A1-A2
A1T A1-A2
A3T A1-A2
TRT A3.5-A4
A1T A3.5-A4
A3T A3.5-A4
TRT Metal
A1T Metal
A3T Metal
Try-in Paste
Rotsaert Dental Laboratory specializes in all aspects of fixed and removable restorations.